Showing posts with label Adventures. Show all posts

Thursday, February 6, 2020

How I Run A Point Crawl

Apropos nothing, how I run a point crawl.
 Make a master map of a constrained area like an island, a valley, a plateau, a big oasis, ECT...
Make a less complete player’s map. Give the players the map (maybe they have it from a patron, inherited it  or have them find it on a dead body or in the hollow of a tree or something) and a reason to explore (they’re hopelessly lost in the wilderness and are trying to find a road back to civilization, the villain went that way, looking for Captain Fatbeard’s treasure or something).
Make sure there are places to go and ways to get there. There can be hidden paths and trails, shortcuts and hidden locations. Make notes on how long it takes to get from one place to another.
Add in some kind of completely hidden way to get around (like an underground canal, or teleportation network -who owns that shit? Are they guarding it? How do you get access to it).
Decide what/who lives where.
Are there factions? Make some up, whether they’re tribal groups, wizard minions or whatever.
Create encounter tables, decide on the daily number of encounter checks.
Think about weather, decide how you want to deal with that. (Example 1 on a d12 means a storm, maybe 2 means fog, maybe 3-12 mean everything is normal, whatever).
Make a bunch of small sites, like an abandon town (why was it abandoned? How long ago?) a ruined temple, a slave mine, vivisectionist tower, overgrown pyramid and/or vampire castle- whatever.
Start the characters seconds after they come across the map. Make them decide how they came to be there or got lost or whatever and how they know each other. Put something mysterious with the map (like an assortment of weird things that look like tuning forks, but are really sonic keys to different locations in the wilderness.)
Tell them a storm is brewing and maybe they should look for shelter.
Bang, you’re good to go.
Pic unrelated?

Saturday, September 10, 2016

Planet Four Friday #2 First Look at the Dead Pump


Yeah, it's Saturday, I'm late.

The Dead Pump

Ages ago, before the seas drained away, in the long forgotten time of the Sky Kings, the Dead Pump functioned as an atmosphere factory- dispersing valuable oxygen and regulating the local climate. Corrupted by some unknown alien influence at some point during its eons of active service, the factory became, slowly, over the centuries, a place of sudden and macabre death. The Sky Kings abandoned the facility, ritually sealed the entrance and left a huge warning marker at the entrance of what is now called Shadow Canyon, as was their custom.

The Skull Monolith marks the Entrance to Shadow Canyon.


A stair behind the monolith leads down onto the floor of the canyon.


Next week I'll go into either airships or continue posting pieces of this. Everything thus far is of course a work in progress.

If there's anything you'd like to see in this segment, give a shout out below.

Sunday, March 30, 2014

[map] Cyclops Wood Full

This is the initial campiagn area; after moving through Zimon's Gate, the characters will find themselves at the top of a mountain road that brings them down onto the sotheast portion of the map. Referees could also begin in Dogwall or Molt without too much trouble. Dogwall is a day's walk (more or less) on the other side of the stone bridge, and Molt is upriver on an island in the glacial lake.

Larger version

This was a bitch to draw, btw.


Thursday, February 13, 2014

[Map] A section of the Cyclops Wood, and thoughts on wilderness adventure.

Although I have made a few in my time, I have gown increasingly less fond of big hex based sandboxes. I think wilderness adventues are a great idea. I do not believe, however, that hexcrawls are to the widerness what dungeons are to site based adventures. Walking and exploring have become big parts of the work I do in meatspace and hexcrawls absolutely fail to capture what I love so much about both.

Imo, most hexy things try to cover too much space and getting lost is a ticket to boredom. Now, my worklife aside, when I was a neglected child and spent my time wandering around defunct railroads and empty country, getting lost was fun, because you poked around until you were not lost, and you found stuff along the way. Also, you can easily spend days exploring what is represented by just one hex on most maps, but they usually have like one detail. This strikes me as too little and too arbitrary.

This map is the beginning of an attempt to convert some of this thinking into gamables.

It:

1. Constrains the players- the ravine is in the west, the east side is mountain cliff face. The bridge is flimsy or magic and you can only cross once, maybe- or just finding your way back to it could be the challenge.

2. Ensures that you will have to leave the road.

3. Gives you stuff to find once you get lost. That is the moon capsule from The First Men In the Moon up there on the top left, btw. I don't think lost should be a matter of rolling a random direction, but rather a random destination with a random duration of travel.

4. Has room for factions.

5. Has an ecology (take my word for it)

So the idea is you have to explore and interact with the environment (e.g., deal with the locals, figure out how to cross the boiling mud, decide which way to go on the road at the fork, discover that someone has fucked with the signposts, and so on...) on the way to your goal (which in this case is the big skull hill thingy) instead of just passing through. Not every landscape is an adventure, of course, in the same way not every building is a dungeon.

Note: I don't have the scale on the map but it is like a 4 hour walk from the bridge to the fork in the road. Also, the apex predator here is an insane allosaur.

I'll key this up in a day or two, probably like the Molt map, but with stats and shit

Come at me, bro.


Tuesday, September 24, 2013

Place of Skulls: Area 8


8. The Drawing Room

Door: North: Stone x 2. both are immensely heavy (6d6 STR check, up to three characters may add in their strength to the effort/check) to shift each one.

South: Locked.

Smell: Nothing remarkable

Light: Warm lamplight emanating from overhead chandelier.

Inhabitants: hostile furniture.1 Settee; 2 chairs; 1 coffee table; 2 bookshelves.

Furniture all has the same combat stats.

AC: 4(15) HD 2 HP 10 Attack 1d6* Morale: 12


*bookshelves attacks by hurling books. Each shelf hurls 2/round and has a total "magazine" of 20.


Aside from the strange looking and remarkably well preserved furniture (seeming value 1000gp total) the room has two paintings, one on the west wall and another on the east. The former depicts a sinister looking black galleon upon a rough sea beneath a slate grey sky; the latter shows the interior of a torture chamber, as seen, perhaps, through the blood smeared vision of one of its unhappy occupants: foreboding shapes loom over humanoids of indistinct aspect. Both paintings seem almost to move and breath with life. Looking at either engenders an unease.


The furniture will attack when the south door is attempted or if someone molests either of the paintings. Unless someone is watching it specifically, the furniture will have surprise. Once the room is vacated it automatically reassembles itself.


Friday, September 20, 2013

Place of Skulls, area 7

7. Dragon Skull

Door: All locked.

Smell: Dust.

Light: Dull red glow, emanating from the dragon skull


The center of this room is dominated by a 20' long dragon skull. The snout of the skull points east. It gives off a bit of heat and is warm to the touch.

A large chair made out of humanoid seeming bones resides within the skull, a seated figure looks out through the eye sockets. If a character sits in the chair they will heal all damage, and gain a permanent +1 to all their attributes- even if it mans pushing them above 18. If this occurs the skull will instantly cease to glow and no one else sitting in the chair will gain any benefit at all.


Monday, September 16, 2013

Place of Skulls, Area 6

6. Pit of Hands (trap)

Trigger: Weight on the floor.

Disarm: Cannot be disarmed, but can be avoided

Save: None for the lead character(s) in the marching order. All others: 5d6 DEX check.


The floor either side of the pit collapses downward, transforming into a slide. Characters that fail to save tumble into the pit and suffer 1d3 damage from the fall.

Each round after the trap is activated, 1d6 smoldering. ruin graven black arms sprout from the wall. Claw like hands strike and grasp at the pit's unfortunate new occupants. If one hand hits a character he is held back, and must destroy the hand, or break free from its grasp (4d6 STR check). Only one hand will grasp a character at a time. The remaining hands will attack, punching and clawing. A character must reman free for an entire round n order to climb out of the pit. Free PC's that choose to sacrifice their attack may actively dodge and thereby receive a +2 bonus to AC.


Sunday, September 15, 2013

Place of Skulls: Area 5

Presented without stats, because lazy.

5. Treasure Cave

Doors: North Door: secret; south door, partially blocked by rubble, but accessible.

Smell: Fresh air, water.

Light: Adequate and aesthetically pleasing, natural illumination enters the chamber from the surface through small breaks in the ceiling, during daylight hours. Evenings are lightless.

Inhabitants/Encounter: 2 Sea Monkeys live in the pond, along with any number of fish. Various rodents and other small woodland animals have nests within the cave, and/or use the fish as a resource. Dozens, if not hundreds of common bats sleep on the ceiling during the day, exiting through the fore mentioned breaks in the cavern ceiling. One giant, intelligent, talking bat lives among them. This fellow styles himself King Giles. King Giles seems nice enough, but in actuality, he is an asshole. Given the opportunity, he will descend from the ceiling and speak with the players. He will offer to sell them information for morsel of food. And tell them about the treasure chest on the lake bottom. As he approaches, Giles will shout at the players and assure them he means no harm. In fact, however, he is in collusion with the sea monkeys, who wait, buried in the mud of the lake bottom, on either side of the chest.


If the players attempt to remove the trunk from the bottom of the lake, they will find that a trick of the light has distorted the perceived depth of the water, which is much deeper than it initially appears. The trunk is firmly lodged in the lake bed, and it will come free 1d3 rounds after one or two characters beat a 5d6 STR check. The arrival of the PC's on the lake bottom will kick up a cloud of silt, unless they specify caution to avoid doing so. 2d6 Dex save.


However, the sea monkeys will attack once the players are engaged in the act of raising the trunk. They will gain surprise by swimming through the cloud of silt. If there are PC's on the shore or on the water (in the boat from room 4, perhaps, they will be able to see that something is going on but unable to tell exactly what. At any rate King Giles, and 1d12 of his bat minions will attack any characters on the surface.


The trunk is locked, but there is no trap. When the trunk is opened the screaming wight trapped inside it will leap out and attack the nearest character. Otheriwise, the trunkis empty. Lol.


Saturday, September 14, 2013

Place of Skulls: Area 4


4. The Salon

Door: Stone x 2. both are immensely heavy (6d6 STR check, up to three characters may add in their strength to the effort/check) to shift each one.

Smell: Reptile, brimstone, a hint of water.

Light: None- zero visibility.

Inhabitant: Ruinsnake

AC: 4(15) HD:3 HP 15 Morale 12 Attack bite/squeeze 1d6/1d4. Bite: save vs. spell, fail results in contraction of the Ruin Curse. I don't know what that is yet.


This high ceilinged (5m) room contains: a small canoe made from a mysterious black wood (dire wood- if there is an elf in the party INT check with 3d6 to ID) resting on a stand, suitable for three occupants or two and and some baggage; three amphora of wine (100 GP value each) decorated in Grall script and pictograms; one dust and tarnish covered drinking couch (if the couch is cleaned, four 200 GP gems will be revealed, two mounted in either arm); the crumbled remains of a chariot. Water seeps into the room and lies in a puddle in the NE corner.


The ruinsnake resides on the floor, behinds the amphora. It will wait to strike until someone draws near. Unless the characters are very cautious it should have surprise.


Friday, September 13, 2013

Place of Skulls, Area 3

3. The Screaming Dead

Door: Locked

Smell: Death

Light: A sickly, pulsating green light, emanating from sarcophagus' imperfect seal.

Inhabitant: 1 Screaming Wight

AC 4 (15) HD 3 HP 15 Attack 1d8 strangle/ 1d6 claw MV 120 Morale 12

As the door opens the wight will explode (screaming) out from sarcophagus and attack the closest PC. Its preferred tactic is strangulation. If it achieves a hit, the wight will latch on to the target's neck, doing an immediate 1d8 damage, and leaving deep black scars that will never fade. A 4d6 STR check is required to break free. Up to two other characters can assist.


Scream kills momentum -1 to all attacks. If escalation die house rule is being used: the escalation die is negated as long as the wight is up and screaming. Further effects: weapons dropped on a roll of 1-3; save vs spell or fall to the floor with hands over ears. Character can attempt to save again every round. Once made no further save is necessary. Wight dressed in suit of human sized black chain mail. Mundane tulwar sheathed at hip, slightly rusted, dull -1 damage until sharpened. Gems in hilt worth 1200 GP.


Thursday, September 12, 2013

Place of Skulls: Area 2

2. Ransacked Tomb

Door: Jammed.

Light: None

Smell: Moldy with a hint of Reptile

A broken stone sarcophagus lies in shattered fragments on the floor along with a rusted spear and short sword. The latter items, obviously of gnollic manufacture, have little value as treasure, but could be repaired and made useful. Careful inspection of the room will result in the discovery of a small coffer, at the rear of the chamber, behind the remains of the sarcophagus base. Seemingly carved to look like a humanoid heart, the coffer contains five otherworldly black gems, with obvious magical properties. Each will grant the bearer +1 bonus to all saving throws, however, bearers of the gem will test positive if scrutinized with a detect evil spell; carrying more than one gem will not grant any further bonus.


Wednesday, September 11, 2013

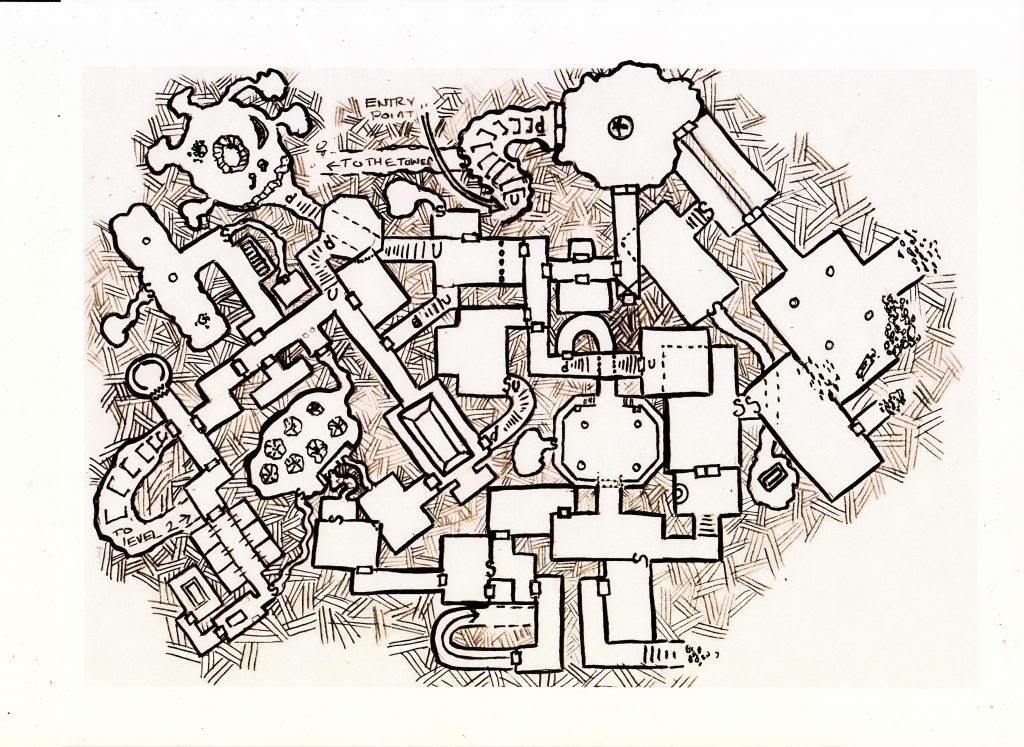
Place of Skulls map, intro, area 1

First, stuff nobody needs to know: I'm going to try to post a room/area a day until all the open maps for the dwarf project are done. The valley and the under-vale and the Wide World are all mostly keyed- however i have eschewed numbered hexes on the former and just keyed the important and interesting places. I will build some detailed encounter tables rather than placing static encounters over the entire map. The two smaller dungeons (Zimon's Gate and the Place of Skulls) are about half done. The megaleval at Urux remains untouched and is my nightmare right now. Also I will recommence posting Beyond the Leaning City this Friday. I'm not sure why I stopped.


Introduction;
The Place of Skulls (#4 on the VoS key) lies deep within the shadows of the Burning Forest in the south eastern section of the Vale of Sorrow. Interred within are the remains of several Grall (the common use name for the pre-sundering folk). There are several Skulls of power, a magic boat and a not inconsiderable amount of coin. Further, there is a series of hieroglyphs that explain the workings of the Moon Stair.

Key:


1. Entranceway
Door: On the surface; blocked by rubble. 2 full turns will be required to clear away the debris.
Stair: Down. Ancient, crumbled. The first character to descend the stair must make a DEX/INT check (whichever is higher); failure results in a misstep and and a short fall down the stairs for 1d3 points of damage.
Smell: Dust and Mildew.
Sound: Drip, drip, drip...
The stair lets out onto a chamber supported by featureless basalt pillars and lined with graven sandstone slabs. Water drips from the cracked limestone ceiling and lies in small scum covered puddles on the floor. Three lightless archways lead off the room.

Note: The Moon Stair is a flight of steps that manifests only on nights of the full moon. It is the only way to reach The castle level of Urux situated near the top of Mt. Thorn.

Note 2: Building a better bandwagon: won't you join me? Draw, borrow or steal a map (that Logos fellow from whom I appropriated my mapping style wholesale has a shit ton of awesome ones on his blog, or you could use a geomorph mapper thingy, or even take one of the maps on the left here, or use the piece of shit at the top of the post. Who gives a fuck?) and key it one room at a time. It beats answering 30 boring ass questions, but, of course, that is just my opinion, and I am a well known jackass. Hee Haw.

Friday, August 30, 2013

Beneath the Vale of Sorrow, The Monster Garden and Arena Cave

The Monster Garden:

A festering growth of vile magical plants, the roots of which stretch all the way down to hell. Every so often, the womb pods of the plants will vomit out a number of vile creatures. The creatures evolve and change in small ways over time, making every harvest different than the last. War is the only constant.

When they reach maturity ( a matter of hours) the garden monsters will set out in force to cross the lake in Arena cave, making war on the dwarfs and gear of the fortress there. Many battles are fought on the surface of the lake.


Arena:

A force comprised of a lost dwarf clan and their magical robot soldiers (called gear), keeps vigil in this cave. They are sworn to keeping the spawn (their name for the creatures that come down the stairs at the far eastern side of the lake) in check and forever contained. They are unaware of the true nature of the garden and fight with a grim fatalism, accepting that some day they will be overcome by the spawn.


There is a courtyard deep within the keep where the dwarfs grow the souls of the gear on glorious magical ghost trees.


Adventure hook: explore/destroy the garden.


Tuesday, October 23, 2012

Xolox, Level one, Beneath the Maiden [MAP]

A spiral stair found within the structure known as the Maiden, leads down into the darkness, and into what was once the true abode of the space vampires. They lived, fed, worshiped their obscene martian gods and exercised their unholy science within these tunnels, leading some scholars to believe that the architecture of Under Xolos is a physical reflection of the aggression, paranoia, isolation and lust that are said to lie at the core of every vampire.

Once the vampires ruled Satan's Spine, but the waxing of the sun brought them down. Here though, at Xolos, isolated from even the wasteland by the lethal vapors of the Blacksmoke sea, one must wonder: what secrets, what treasures, what power might linger?


Larger version HERE.

Monday, February 13, 2012

Megadungeon Monday: Halls of the Hidden Prince LVL 2; areas 9-15

Well its Monday here for two more minutes anyway.
Map is on the left.


9.  The Room of Skulls.
Illumination: None
Smell: None

This room is lined with shelves. Hundreds of skulls, from every manner of folk, crowd the shelves. Set in the face of the eastern wall, a plaque written in the script of the Minotaurs reads “Enemies of the House”

If the characters touch or otherwise disturb any of the skulls they will attract the attention of the malevolent spirits that haunt the room.


Spectral Horde
Ac 2 [17] HD 4; Attack: Telekinesis 1d6; Move 6;  Special Can attack 1d6 times a round; XP 300

A spectral horde is a conglomeration of petty ghosts who come together to combine their otherwise insignificant power. The horde cannot only be hit with magical/radiation based weapons. The horde cannot leave its source area (in this case it can not leave the Room of skulls.


10. The Orchard

Illumination: Very dim dull red glow emanating from the trees, limited visibility (see below).
Smell: Like Rotten Bacon. ST or gag for 1d4 rounds (-2 to all die rolls for duration).

This area is a natural cavern. The river runs through it, and the noise of water is loud but not overwhelming.  Bats flutter everywhere, their wings set aglow by the dull red light.

North of the river: Twelve meat trees depend from the vaulted, stalactite-covered ceiling. 
Each meat tree exists as a distended spindle of moist, pulsing ligature and flesh; clusters of faintly luminous, man-sized, scarlet, translucent, bulbous and blister-like sacs of glistening, squirming membrane are spaced unevenly along its length. Sacs that have been recently filled betray vague outlines of the bodies of animals and humanoids, writhing away their final agonizing moments as they are digested by the tree, and thus turned into food for the grublings The meat sacs provide both the room’s illumination and odor.

At any given time, 2-12 grublings will be feeding from the sacs, each thrusting its large, hairy proboscis into one of the writhing nodes and drawing forth a gory slurry of liquefied flesh and bone in a rapturous feeding trance. Feeding grublings will always be surprised if attacked and can also be stealthily avoided - see below.

If he has not appeared already, a 1-2 on a D6 indicates that two grublings are stuffing what looks to be the body of a dead Shae sorcerer into one of the sacks as the characters enter the room. This is Pheen Vox* who may or may not be alive at the referee’s discretion. His facial tattoos make him instantly recognizable.

The Bridge is thoroughly coated in sticky brown mucus, but it is open and uncluttered by meat trees.
The river running beneath the bridge has a depth of about 4 feet. The water has an oily sheen and stinks of garbage. Streams of mucus, fragments of insect chitin and offal pollute the stream. 

South of the river: Ten meat trees.1d8 grublings feedings. Three pairs of drones are stationed on this side of the river. Squad A stands before the door to room 13, and Squad b stands at the mouth of the passage leading down to room 11.   Squad C is stationed by the between the door to area 33 and the river’s point of entry in to the cavern. The squads are unable to see one another but will sound the alarm and come to one another’s aid during the second round of combat.

The Skeleton in the Lake: A giant skeleton (15’) lies supine in the lake, resting on its elbows, with its skull, thorax and right knee above the surface. A stylized star-like ruin is burned in to the middle of the forehead, and in the center of the ruin there is what appears to be a very large keyhole.

Grublings: AC 6[13]; HD 1+1; Attack Proboscis 1d6; Move 10; XP 15.

These creatures represent the larval stage of the roachmen. They are stupid and hungry.
Drone:  AC 4 [15]; HD 3; Attack Sword 1d6; Move 12; XP 40
Drones are roachmen at a more advanced, aware stage of their development. Drones will fight to defend the nest at all costs.


11. Lair of the Duchess:
Illumination: Bioluminescence 
Smell: Acrid, chemical

This large cavern is the lair of the Insectress’ chief lieutenant and queen of the roachmen, the Duchess: a bloated, egg-producing arthropod monstrosity. The cavern floor is covered with a crusty landscape of dried secretions, from which the acrid chemical smell noted above emanates. Half eaten carcasses of people and animals protrude from the crusted slimy nightmare-scape. The Duchess lolls atop a raised dais at the west end of the room, the disarticulated remains of her most recent lovers scattered carelessly about her.  

The Duchess: AC 2 [17]; HD 6; Attack: Tentacles, Fangs 1d6; Move 18; Special:  See below    XP 500 l
This huge beetle-like arthropod is covered with a bulbous and ruin marked carapace. A glowing orange-red tentacle sprouts from the top of the Duchess’ head. During combat the Duchess may attack with both its fangs and one tentacle each round. Any character hit by a tentacle attack must roll a d6 and add in either their strength or dexterity bonus. If the roll with bonuses equals a 6 or more the character manages to avoid being immobilized and takes no damage, but they are still caught within the grasp of the tentacle. If the character remains conscious through the next round they make attack or make another roll to try to get free (1d6 + Strength or Dexterity bonus. A roll of 6 or greater results in the character escaping from the Duchess’ grasp.  Once a day the tentacle can cause petrifaction (negated by a successful ST).


Treasure: Two large amphorae are leaned against the far western wall of the cavern (on the far side of the river from the entrance). These can only be seen easily from the west side of the river, they remain invisible from the other side unless a superior light source is in use.
Amphora 1 contents: 1500 sp; 1 neutron knife ( Standard rules:1d12 damage, functions as a magical weapon; Metal Earth House Rules: wounds on a successful hit, unless target makes a successful ST, in which case 1d6 damage).
Amphora 2 contents: 2500 GP and assorted gems equaling roughly 4000 GP in value.


12: The Robot Shrine
Illumination: Faint and flickering orange light from a dying wall-mounted glowstrip.
Smell: Rust and oil.

Shelves laden with all manner of mechanical hardware line the walls of this room. There is a break between the shelf rows along the southern wall of the room; here, hidden behind a veil of burlap, sits the rusted out body of an old mining robot upon a throne made from twisted metal wreckage. Candles have been placed around the figure, and ruins drawn on the floor at its feet. An altar made of discarded machine parts stands before the throne, at the center of the ruin marked space.


13. Roachmen Ready Room
Illumination: None
Smell: Shit
This room is meant to serve as a buffer between the egg chamber and the dungeon beyond the area controlled by the Duchess. 4 Drones wait here they are asleep and hanging upside down. The floor is a trash heap of bones and insect casings.

Drone:  AC 4 [15]; HD 3; Attack Sword 1d6; Move 12; XP 40


14. Holding Pen
Illumination: None.
Smell: Shit and Blood.

This heavy iron-bound door is locked with two chains. 8 slaves wait within. Two shae; a sasquatch; three minotaur and two lizardmen. They will all make promises of how much they can pay if they are helped out. 1d4 of them are beyond help and cannot be moved, although given constant care and successful STs they might recover in 1d6 weeks. All of the prisoners  are adventurers and the group may make a good pool from which to draw henchmen and/or new PCs.


15. Nursery:
Illumination: Green glow emanating from egg bioluminescence
Smell: Ammonia

Any signs of this room's original purpose have long since been obliterated. Each about the size of  a grown man’s head, hundreds of green glowing, gently pulsating translucent eggs cover every available surface of the room. The eggs are grouped together in clusters. Three Matrons move amongst the eggs, tending to them and will respond to any threat with immediate and violent action.

Matron: AC 4 [15]; HD 4; Attack Claws; Move 12; XP 120 


*Pheen Vox is an 3rd level Shae Sorcerer who entered the Halls of the Hidden Prince in search of treasure. His family has offered to pay 10k GP for his safe return 0r 5k for his corpse. I will flesh out this hook when I revise the dungeon. 

Tuesday, January 24, 2012

Halls of the Hidden Prince LVL Area 8 & 9


7. The Audience Chamber
Illumination: Shimmering ball of ghostly blue energy at the room’s center.
Smell: Dust and ozone

The broken remnants of furniture and art objects cover the floor of this large chamber. A rusted throne of wrought iron sits on a dais of crumbling limestone in the center of the room’s north wall. 1d4 rounds after the room is entered. The shimmering blue ball will explode (no damage). Ghostly energy will disperse about the room and two spectral armies will form, a force of Lizardmen and another of quite ones and stone dead. These armies will engage in a savage battle, complete with screams and the clang of weapons that last for 3 rounds, after which the armies will be sucked back in to the newly formed ball. This process repeats itself every 4 rounds.

A secret compartment in the rear of the throne (found on a roll of 1 on a 1d4) contains an energy pistol with three charges. [Using conventional rules the pistol does 3d6 damage]. Metal earth house rules it does 1d6 if the target makes a saving throw or a roll on the wound table if they do not.

8. The Faux Bedroom
Illumination: very dim yellow light from a ceiling mounted crystal
Smell: Dust with a hint of oil

The noise of snoring can be heard immediately upon entering this room- or before that if someone listens at the door.
This chamber is an obviously an ornate bedroom. It is full of fine furnishings, including a large writing desk; a beautiful wardrobe with gold inlay and (beneath the dust) a painting of the Cloelle the minotaur corn goddess (think of a really hot chick, but with a cow’s head); and a four poster canopy bed.  The room is, of course, as cobweb and dust covered as all the rest, however it appears that someone is sleeping on the bed. If the sleeper is disturbed (or 3 rounds after the room is entered if ‘he’ is not)  the door will slam closed and lock of its own accord. At this point the sleeper will rise and attack the party.

The room is actually a trap for would be assassins and the sleeper is, in reality, a techo-magical construct set there to lure in and destroy said assassins.

Magical Minotaur Robot
AC 4 [15]
Hit Dice 4+4
Attacks: Blade 1d6/Gore 1d8+1
Move: 8
XP: 400
Special +2 to hit with Blade

The construct is a mass of gears and widgets held together by glowing ruin inscribed brass and stone plates. It has the shape of a minotaur.
The construct will fight until it is destroyed and is immune to all magic.

A sword is welded into the robot’s left hand at the beginning of combat. This is a +2 magical weapon and if the MMR is defeated the sword can be removed in 1d6 turns.

The MMR’s horns are made from strange luminous blue crystal. If removed they will fetch ~ 250 gp each.

Sunday, January 22, 2012

Hiddeln Halls, level two area 4, 5 & 6

Map is on the the left.


4. Spy Hall I
Illumination: Dull green radiance, emanating from an ancient glow strip mounted in the ceiling.
Smell: Dust.

The stonework here is rough and functional. No allowance is given to artifice and the entire length of the passage is bare- with one exception. A 15’ long stone bench is situated along the last twenty feet of the south wall of the corridor’s southernmost east-west extension. Opposite the bench  [on the wall contingent with Area 3] a brass disk, just a bit larger than a human hand, is inset into the stone. If anyone touches the disk, the corridor’s glowstrip dims and the wall becomes transparent, providing a complete view of Area 3’s main chamber. The wall remains opaque on the Area 3 side.

The only way out of this area is through the secret door leading to area 5, or through the portcullis leading back to Area 3.

5. Spy Hall II
Illumination: None 
Smell: Dust

A second brass disk, identical to that located in Area 4, is set in the wall contingent with the short corridor connecting Areas 3 and 4. If anyone touches the disk an arrow/gun slit opens in the wall, providing a perfect vantage point over the passageway between the two portcullises.

The door leading to area 6 is unlocked.
The secret door adjacent to the door leading to Area 6 is extremely obvious and can be found on a roll of 1 through 5 on a d6. The door’s ‘hidden’ seams don’t quite line up with the wall in which it is set and it juts out a bit. It can be ‘opened’ by moving a small light hued stone. Doing this does not actually open the door, it triggers a rock fall- 4d6 damage. The trap is slow and leads off with an ominous rumble. Who ever opens the door is allowed to roll two separate saving throws. If both saves are successful the character takes no damage; if one save is successful the character takes ½ damage. The rock fall will block the opening it will take 1d6 turns to clear the way.

6. Ornate Hallway
Illumination: Flashing glowstrip, alternating from very bright to absolutely pitch black two or three times a second. Unless the characters make use of a good light source, all combat rolls will be made at a -2. 
Smell: rotten carpet (dry) and dust

Note- The secret door leading to Area 5 is trapped- see above.

This corridor is more elegant than Areas 4 and 5 the threadbare remains of a moldered carpet trail across the polished marble floor. Like everywhere else a thick layer of dust covers everything.

A huge sculpted human face covers the location of the secret door. If anyone touches the face, it animates and attacks the party.

Stone Face
AC 5 [14]
Hit Dice 3+3
Attacks: Expectorate (1d12), Bite (1d8)
Move: 8 (See Below)
XP: 200

The stone face can levitate. At the commencement of hostilities it lifts away from the wall and bites the closest enemy. The Face cannot leave the corridor.

The stone face will expectorate a huge wad of stinking acidic phlegm in the second round and once every two rounds thereafter until the end of combat. The first time a character is hit with the loogie, a saving throw must be made, failure results in the loss of one combat round; this round is spent vomiting.

If the Stone Face’s hit points are brought to 0, it immediately returns to its place on the wall, releases a horrific wail and crumbles away to dust, revealing a small alcove lined with shelves. Most of the room is empty, but an ornate vase and a strange looking pair of goggles sit side by side on a shelf near the door.

The Vase: Covered with a finally detailed depiction of what might be a wrestling match between two over muscled male minotaurs, this item is worth 400 gp.

The Goggles are made of brass and encrusted with strange, glowing gemstones.  The wearer of this eyewear can see any secret door (on level 2 only) within 50’- regardless of lighting condtions.

Monday, December 12, 2011

The Hidden Halls Lvl 2, Area 3

The map is on the left


3. Ante Chamber:
Illumination: Pale green crystal, gently pulsing on the ceiling.
Smell: Dust and Mildew

The noise of rushing water is very loud here; it’s cold and the floor is coated in a very thin layer of frost.

A rusted portcullis blocks the easternmost entrance to this room.  A character with 14 or greater strength has a 1 in 6 chance of being able to lift the portcullis. A character with an18 or greater strength has a 2 in 6 chance. Two characters may pool their efforts, but the space is too constrained for more. Unless it is propped up by something, the portcullis will close immediately after it has been released. A metal pole will hold it indefinitely, a wooden staff will hold for 1d4 rounds.

Beyond the first portcullis lies a reception area. The walls are painted in a flaking pastel yellow. The decayed remains of a wardrobe lie in a heap against the south wall; broken fragments of what may once have been a table and chair are strewn across the northwest corner. A search through the wreckage of the wardrobe will yield 200 GP contained within a purse of rotten leather.  The remains of the desk conceal a gold pen and a matching inkbottle cut from onyx; the workmanship on these items is exquisite and if sold as a set they may yield up to 100 GP.  What appears to be a broken gearbox of some sort is situated on the west wall, north of the exit. Presumably its function related to the portcullises. It is rusted, smashed and in no way reparable.

The corridor exiting the room to the west is blocked by a set of portcullises separated by a 10’ passage. An assortment of bones are scattered across the floor of this passage. Any one who cares to examine the bones will note that they are exclusively phalanges, ulna, radius, carpals and metacarpals (bones of the hand and forearm). The portcullises both operate under the same principles listed above.

Two rounds after the portcullis set in the west wall is raised the skeletal hands on the floor will become suffused in a sickly green glow, reassemble themselves and attack; there are 20 of them in all.

Guard Hands
AC 8 [11]
HD 1 hp (attack as 1hd monster, can not score a critical hit)
MOVE: 6
ATTACK: Gouge 1d4-1
No more than 5 hands can attack a human sized target at once.
If the bones are not destroyed (burning is the only way to be certain) the trap will reset itself in 6 hours.

Saturday, July 16, 2011

Madling Island (Map) Part 1 of ?

Click on the pic for a larger image.
(map is not entirely to scale)


Madling Island:

According to popular legend, as related in the wine shops of Ssaur, the so called Madling Island, located in the Purple Lake of The Forgotten Depths, is the site of an abandoned factory, which, during the Lost Wars, was used for the production of Skeletal Warriors. Supposedly, a powerful Madling sorcerer took up residence in the old factory several centuries ago, and abides there still, engaged in an attempt to reactivate the factory's eldritch apparatus in order to raise an army with which to conquer Ssaur and the Rüinlands. The sorcerer is said to have a vast store of treasure. This horde is reported to be made up of magical, monetary and technological constituents. All of this is, of course, hearsay, and it is impossible to identify anyone who has traveled to the island and returned. Thus, the claims of legend remain unvalidated, and true knowledge of the place is scant, if not completely nonexistent.


The truth of the matter is that the rumors are largely accurate, but they tell only a little about the strange and terrible place that is Madling Island.


Madling Island, Some Facts:

The island exists inside a time-space depression (TSD, henceforth); it actually occupies far more land area than it appears to from a distance. Although, at less than a kilometer away, the Island appears to be roughly 15 km from end to end, it is in truth, roughly 10 times as long. Furthermore, time flows differently there; for each day that passes on the island and in its immediate environs, a month passes in the outer world. Obviously, there is no missing the change in physical scale as one approaches the island; however, individuals within the TSD cannot detect the temporal aberration, as the day-night cycle is absent therein, replaced by an endless, brooding and blood-red twilight, punctuated only by the pulsating sullen glow of Godmount.

It is possible that a careful observer from outside the TSD might notice a dull flickering over the island, the cause of which would be difficult to ascertain.


The cause or causes of these strange conditions are poorly understood, although it is likely that the powerful reality warping magic utilized in the creation of entire armies of Skeletal Warriors- and the many other experiments and activities that took place on the island may have been among the causative factors.


Next Time: Reasons to go and how to get there.


Notes:

I like big settings, but I also like mini-settings; what I like best, though, is a mini-setting nested within a big setting. I discovered this whilst running my first full on Metal Earth game (with True20) about five years ago . During the course of that campaign, we thoroughly explored the island of Skeeme, and many of the ideas, which have come to represent the foundations of the larger setting, came into being during the course of that game. I believe the Forgotten Depths has at least four relatively self-contained mini-settings: The Abandon City (Hex 0301); the top of The Fin (Hexes 0704, 0803,0802 &0902); the Weather Control Station/City of the Sharkmen/Megadungeon (Hex 0907); and Madling Island. This is the first in what will be a very long series of posts detailing the last of these.